Mark Zones

Balance Diacritics

Align all diacritics inside of the zones

Zones define the precise vertical areas where marks and diacritics should live. All marks can align to the bottom edge, top edge, or center of a zone—keeping them perfectly balanced relative to each other.

With Mark Zones, positioning marks in their proper location is incredibly simple. A single zone definition applies to all filtered glyphs, making consistent alignment across scripts effortless.

Better than Guidelines

Traditional guidelines require manual adjustments for each line and quickly clutter your Edit View. Mark Zones work differently.

A zone allows a single adjustment for position, thickness, and overshoot—all linked glyphs update instantly. Each zone gets its own color for visual organization, with labels displayed neatly for the entire zone (not one label per line like guidelines).

Most importantly, Mark Zones include overshoot support—round and pointy marks naturally stick out of their zones. With guidelines alone, you’d need multiple lines and manual adjustments to achieve the same result.

Show or hide entire zone groups by toggling their Custom Parameter checkbox—no need to delete and recreate them.

Labeled Zones

Name your zones for easy reference

Assign descriptive names to your zones (e.g., “x-height”, “ascender”, “mark zone”). Names appear next to each zone with a visual brace linking the label to the zone itself—making your Edit View more readable and your workflow more intuitive.

While optional, named zones are invaluable when working with multiple zone groups or collaborating with other designers.

Easy Editing

1.3.0

Adjust zones directly in the Edit View

Hold Cmd and hover over a zone to reveal the grab cursor. Cmd-drag to reposition zones intuitively:

  • Drag the bottom edge to move the entire zone (position changes, thickness stays)
  • Drag the top edge to resize it (position stays, thickness changes)
  • Drag a line zone to move it to a new vertical position

A dashed preview shows the new position with live labels—seeing is believing, and dragging is the fastest way to dial in your zones.

Edit Zones In Place

1.7.0

Open zone properties without leaving the Edit View

Cmd-double-click any zone edge to open the Custom Parameter UI as a sheet—right where you’re working. The sheet appears pre-filled with the clicked zone’s name, color, filter, overshoot, positions, and linked glyphs, so you can adjust everything without navigating to Font Info.

Cancel discards all changes, OK applies them instantly. Combined with Cmd-drag for repositioning, you now have full control over your zones without ever leaving the Edit View.

Undo & Redo

1.8.0

Full undo & redo for Edit View zone edits

Every zone operation you perform in the Edit View is fully undoable with Cmd+Z and redoable with Cmd+Shift+Z—just like native GlyphsApp actions.

  • Zone dragging: Undo restores the previous position or thickness, redo reapplies the change
  • Zone editing via sheet: Undo reverts all changes made in the CP UI, redo reapplies them
  • New zone from selection: Undo removes the newly created custom parameter (including duplicates on other masters), redo re-adds it

No need to worry about accidental adjustments—your zone edits are always recoverable.

Center Line

Automatic vertical centering for marks

For any glyph in the Mark category, a dotted center line appears inside thick zones—ideal for centering shapes that don’t extend the full height of the zone.

This visual aid helps you align combining diacritics vertically, especially useful for marks that sit above or below base glyphs with different x-heights.

Custom Parameter UI

Configure zones without writing code

Click any MarkZones Custom Parameter in Font Info > Masters to open the dedicated UI. Instead of hand-editing parameter syntax, configure everything visually:

  • Filter: Use a Predicate Editor to show zones only for specific scripts, categories, glyph names, or any combination
  • Zone details: Set position, thickness, color, and overshoot
  • Linked glyphs: Define which glyphs stretch or shift when you adjust the zone
  • Multiple zones: Group related zones (all using the same name and color) within a single parameter

All changes apply immediately to your Edit View.

Quick Zone Creation

1.6.0

Create zones directly from your selection

Right-click on selected nodes and choose “New Mark Zone from Selection” to instantly create a zone from the vertical bounds of your selection. The Custom Parameter UI opens as a sheet, so you can fine-tune name, color, overshoot, and filter before saving—no need to open Font Info manually.

For multi-master projects, an Apply to all masters option duplicates the zone across every compatible master. Each master automatically receives its own zone positions (mapped from the corresponding nodes) and overshoot (from its baseline metric)—one click, all masters set up.

Smart Glyph Filtering

1.5.0

Show zones only where they matter

Zones are filtered per glyph using a Predicate Editor—the same interface you know from Global Guidelines. Set conditions on:

  • Script (Latin, Cyrillic, Greek, CJK, etc.)
  • Category (Letter, Mark, Number, Punctuation)
  • Subcategory (Uppercase, Lowercase, Smallcaps)
  • Glyph name (contains, begins with, ends with)

Combine conditions with All (AND) or Any (OR) logic. One zone definition can intelligently apply to hundreds of glyphs across multiple scripts—no zone duplication needed.

Linked Glyphs

1.4.0

Adjust dependent glyphs automatically

Assign other glyphs (typically diacritics or accents) as “linked glyphs” to a zone. When you drag a zone edge, linked glyphs transform accordingly:

  • Stretch mode: Linked glyphs scale proportionally as the zone resizes—ideal for diacritics that need to grow or shrink with the zone
  • Raise mode: Linked glyphs move without stretching, maintaining their relative position and size—perfect for marks that simply need to shift up or down

This respects your font’s italic angle, so linked glyphs transform along the correct slant. Adjust a zone once, and all dependent glyphs follow—no manual repositioning needed.

Mark Zones
Mark Zones

Perfect Alignment with Mark Zones:
A Must-Have Glyphs Plugin

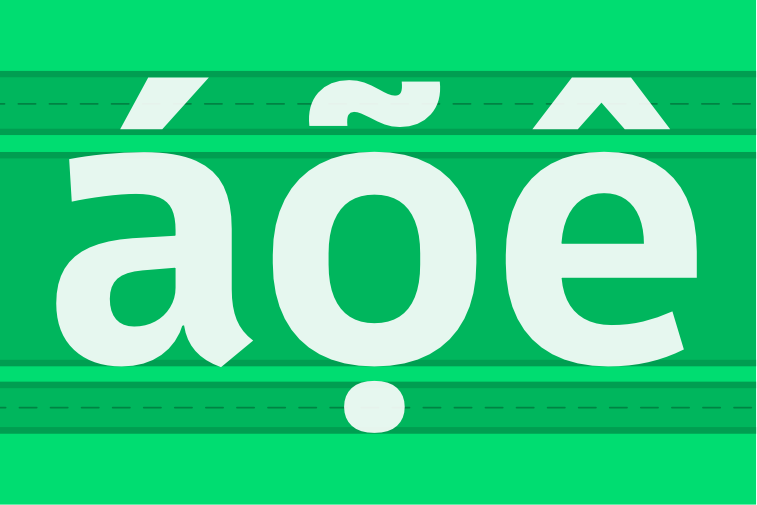
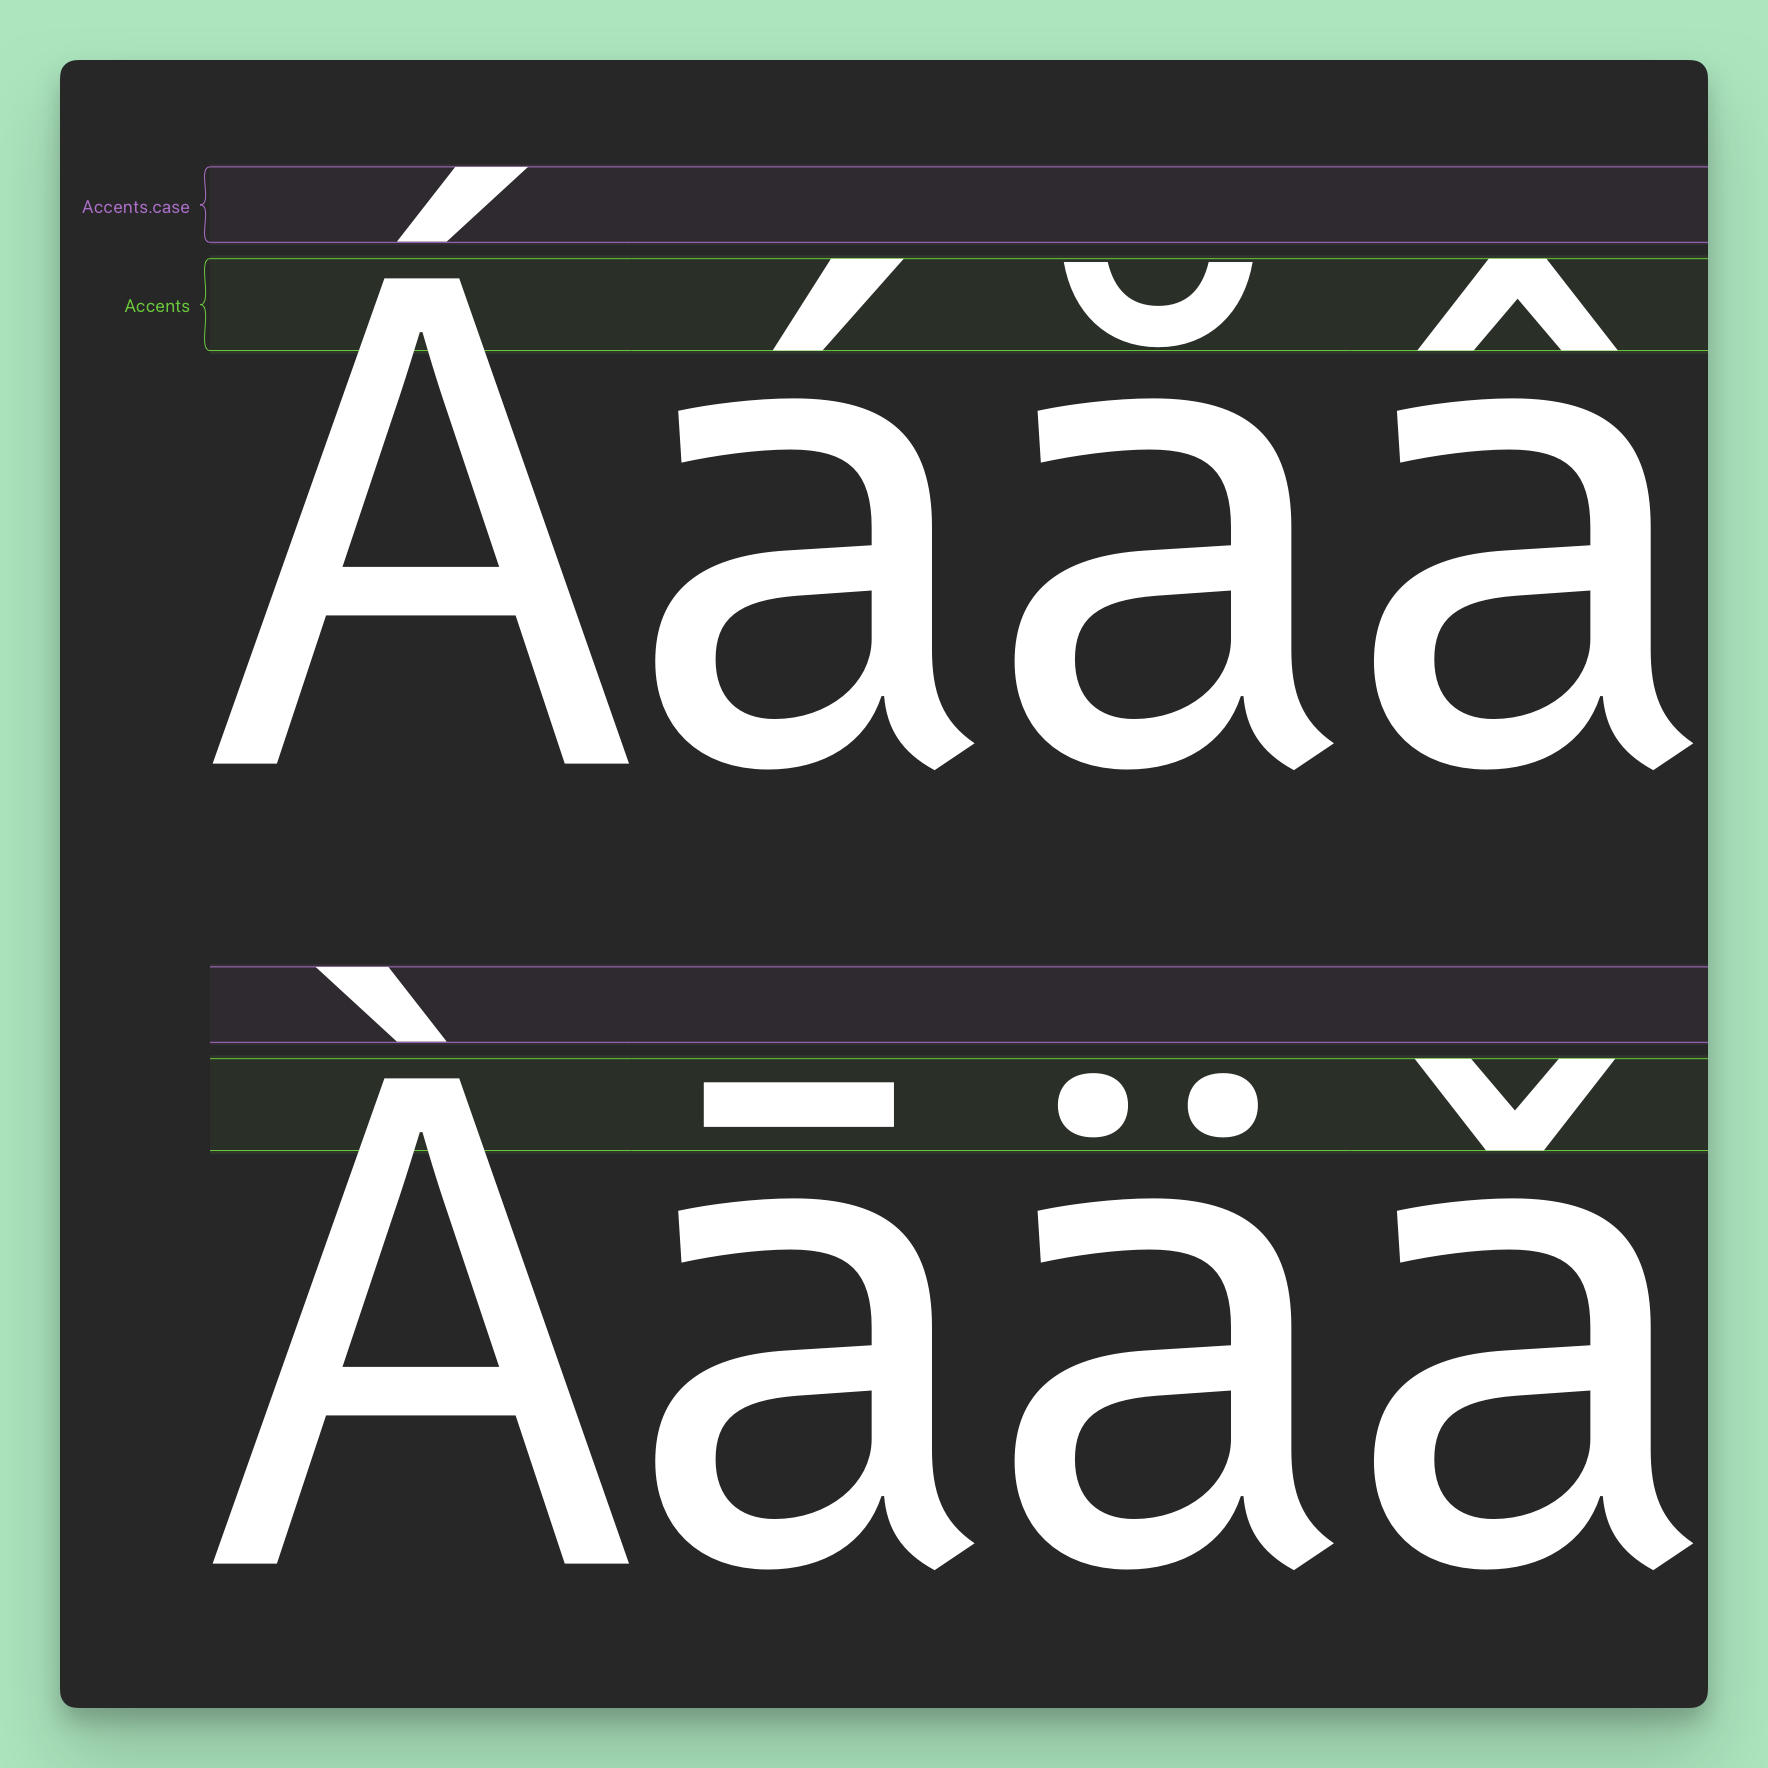
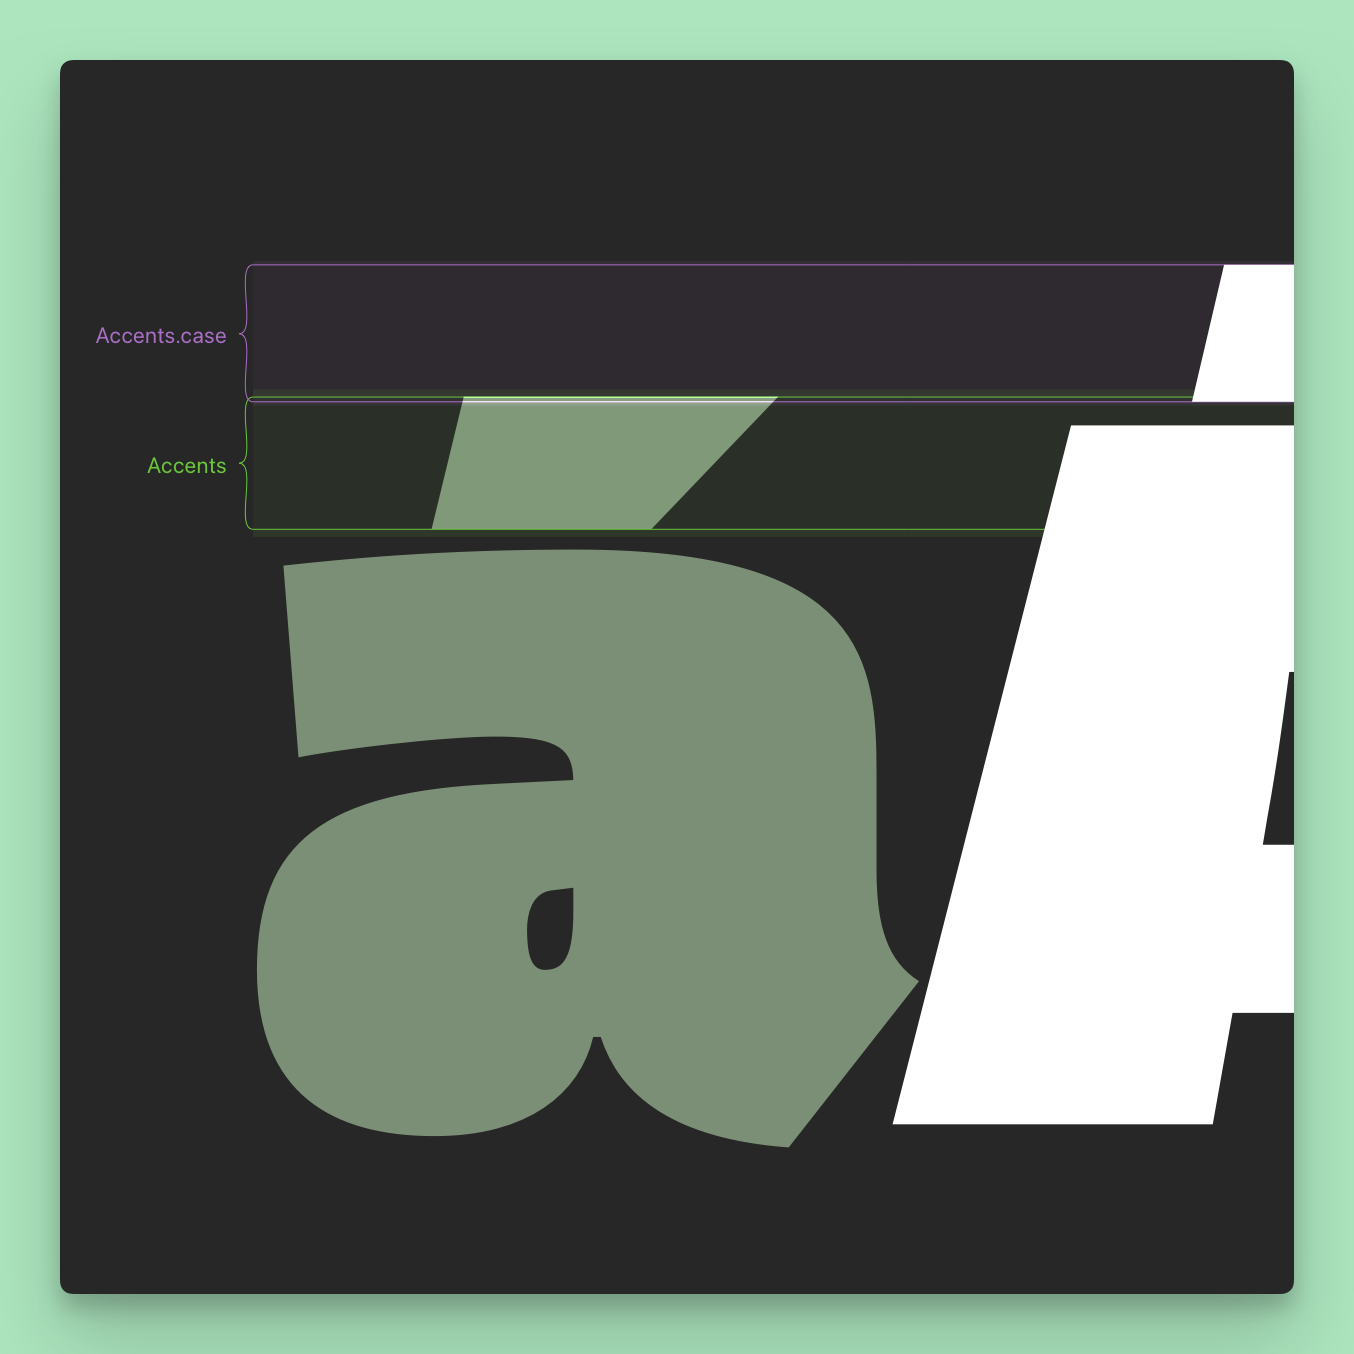
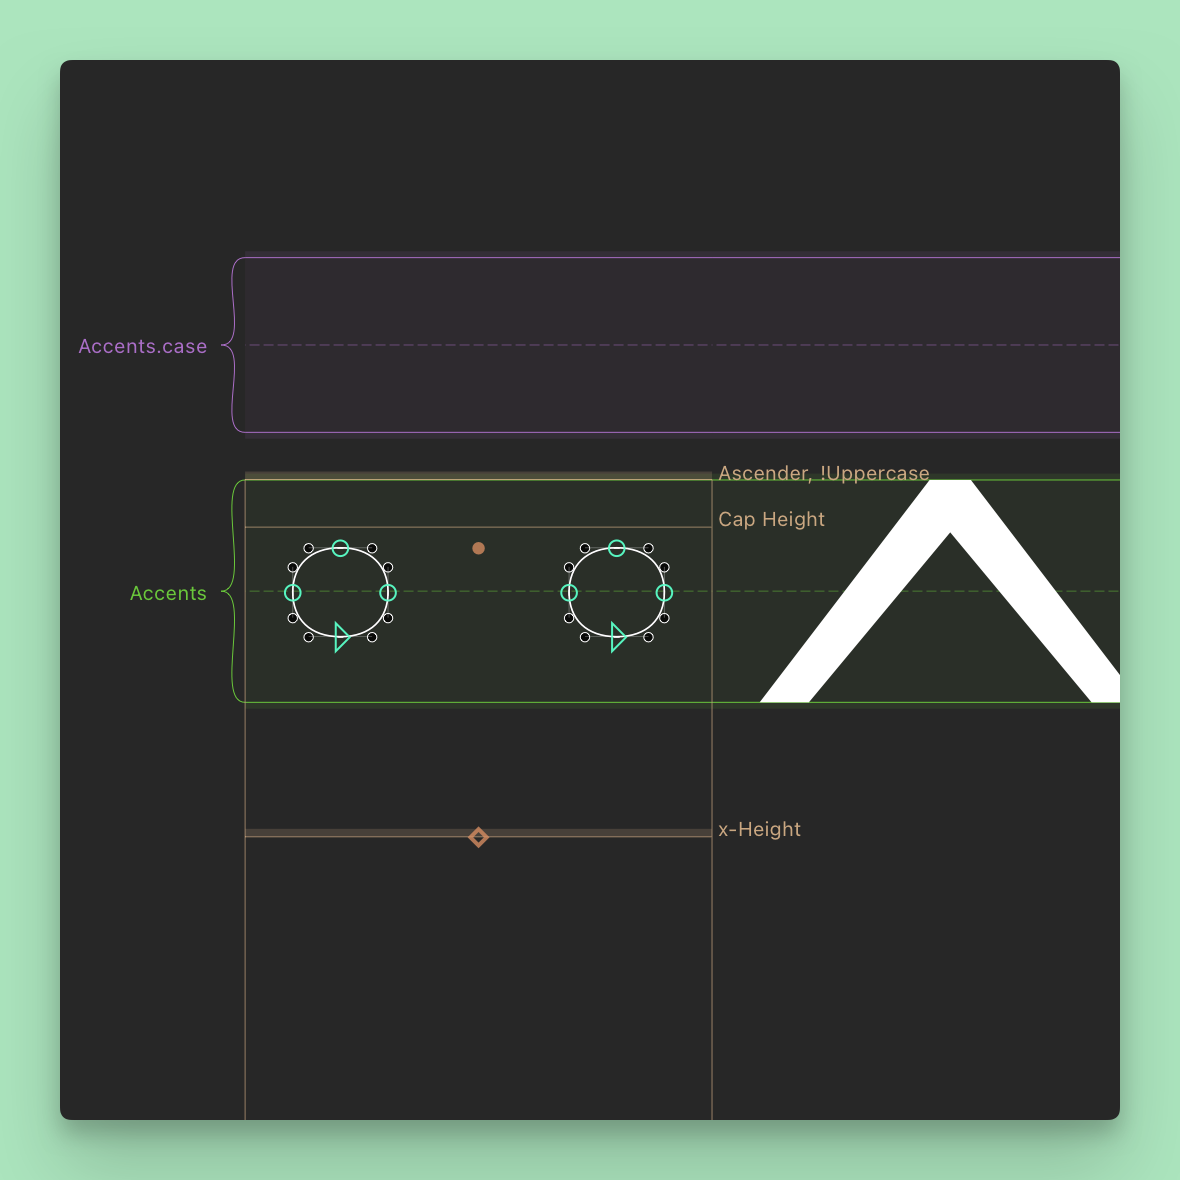
“Mark Zones” is a powerful plugin for GlyphsApp that transforms how you align diacritics, accents, and marks. Forget about cluttered guidelines—zones give you precise control with less visual clutter, intelligent filtering, and interactive editing. Whether you’re balancing marks in multiple scripts or fine-tuning overshoot, Mark Zones makes professional alignment intuitive and efficient.

The Problem with Traditional Guidelines

Traditional guidelines don’t scale well for complex typefaces:

  • They clutter your Edit View quickly, making it hard to focus
  • Each line needs individual adjustment (position, overshoot, color)
  • No built-in overshoot support—you’d need multiple guidelines per zone
  • No way to show/hide related guides as a group

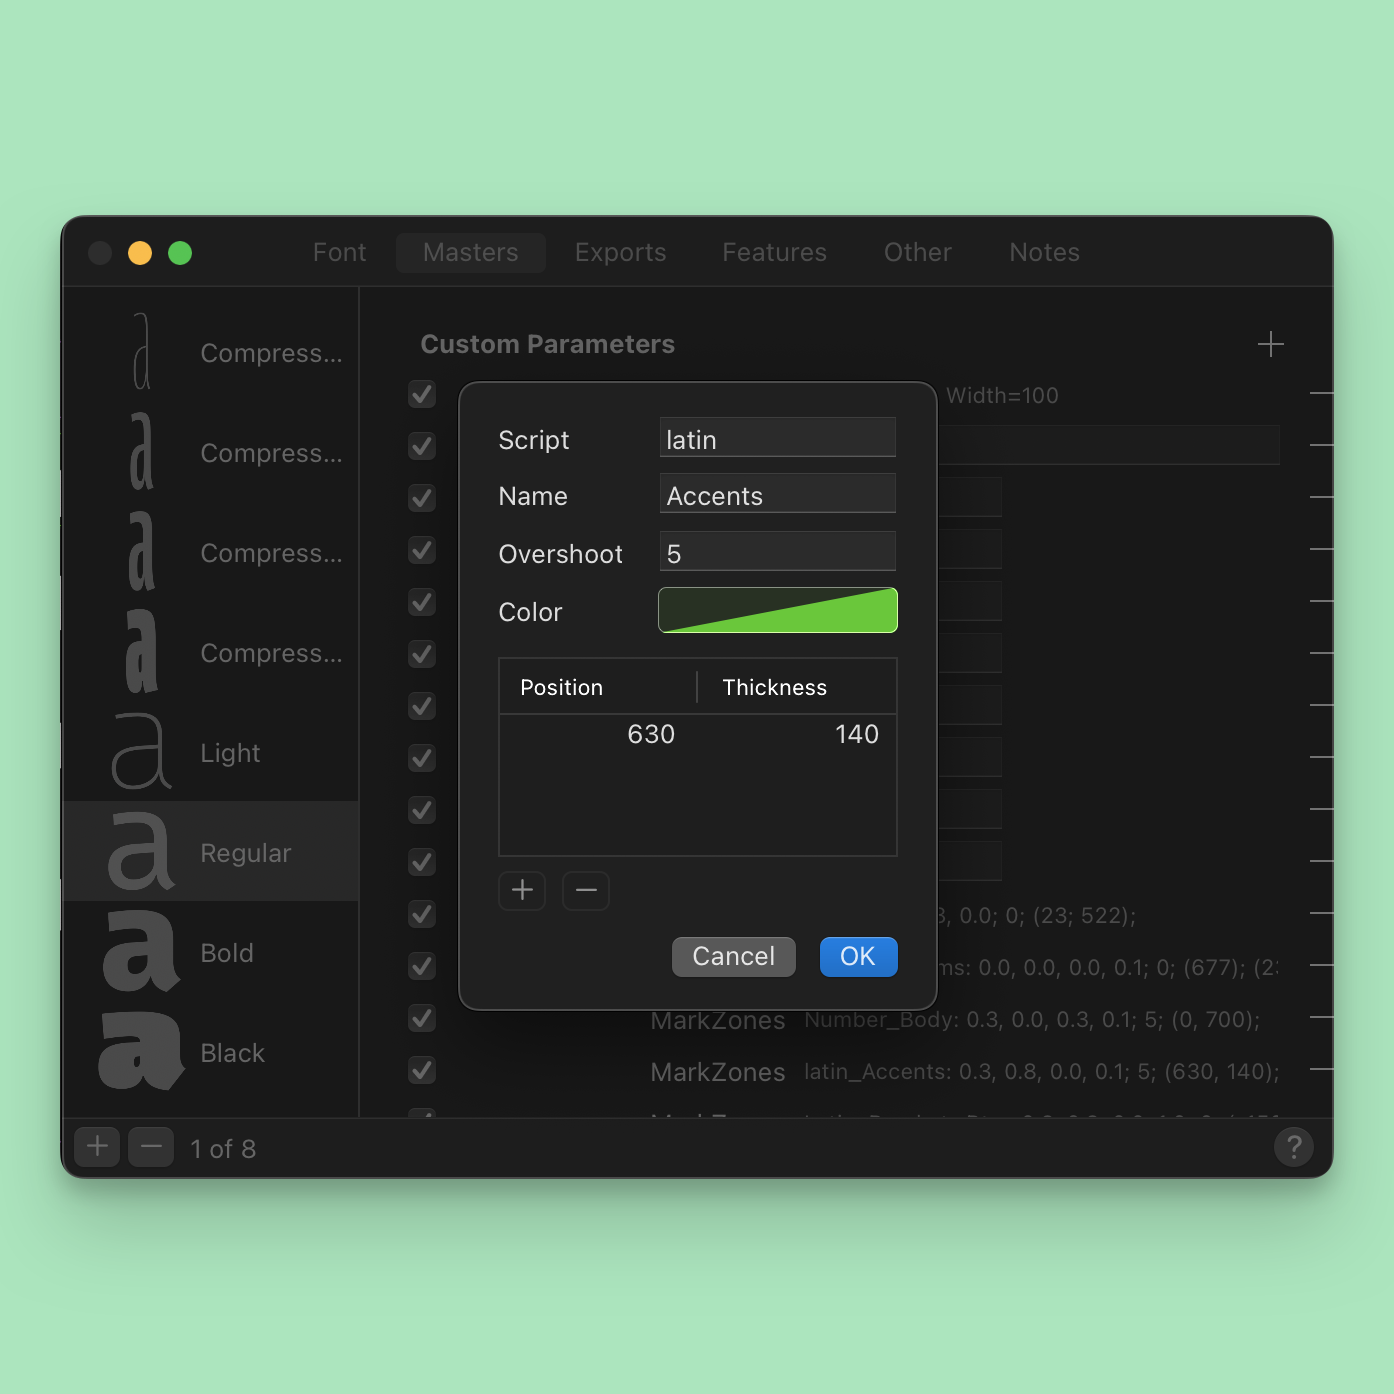
Mark Zones solves all of this with a single zone definition that applies to multiple glyphs, supports filtering, overshoots, colors, and names—all customizable in one place.

How It Works

Zones are stored as Custom Parameters on your font masters. You can create as many zones as needed, even grouping multiple zones within a single parameter to share attributes like color, name, and overshoot. Most importantly, you can toggle entire zone groups on or off without deleting them.

This plugin for GlyphsApp improves your typefaces’ quality!

Key Advantages

  • Clean Edit View: Single zones replace multiple guidelines, reducing visual clutter.
  • Efficient Editing: Adjust position, thickness, or overshoot once—all filtered glyphs update instantly.
  • Smart Organization: Color and name your zones, control visibility by toggling parameters.
  • Intelligent Filtering: Show zones only for specific scripts, categories, glyph names, or any combination.

The Result

Professionally aligned marks across all scripts and styles—with less effort and fewer guidelines cluttering your workspace.

Often Asked

  1. Either click the Install button above, and then:
    1. Allow the browser to open Glyphs.
    2. Accept the install dialoge in the app
    3. Relaunch Glyphs
  2. Or do it manually:
    1. Open Glyphs
    2. Open the Plugin Manager by selecting Window → Plugin Manager.
    3. Search for “Mark Zones”
    4. Click Install next to the Mark Zones plugin preview.
    5. Relaunch Glyphs

You can always contact me via my contact form below. Another way is to open an issue on GitHub.

Related projects: